Tuesday, 29 September 2015

My rendition of ham and shells

I am loving this weather; blue sky and crisp air; perfect for walking to my bus. I was running a little late this morning so I had my breakfast on the go.

Since I'm always food focused I was already thinking about dinner...

I had some ham left over and so I found this recipe online that I thought I could tweak a bit to go with what I had on hand.

Ham & Shells Casserole Recipe

Ham & Shells Casserole Recipe photo by Taste of Home

Ham & Shells Casserole Recipe


TOTAL TIME: Prep: 40 min. Bake: 25 min.

MAKES:12 servings

Ingredients

·         1 package (16 ounces) medium pasta shells

·         3 large onions, halved and sliced

·         1 tablespoon olive oil

·         1 package (9 ounces) fresh spinach, torn

·         1 tablespoon minced fresh rosemary or 1 teaspoon dried rosemary, crushed

·         1/4 cup butter, cubed

·         1/3 cup all-purpose flour

·         1/4 teaspoon pepper

·         3-1/2 cups fat-free milk

·         1 cup Galbani® Part Skim Ricotta Cheese

·         1 cup crumbled goat cheese

·         2 cups cubed fully cooked ham

·         1/3 cup grated Parmesan cheese


Directions

1.    Cook pasta according to package directions. Meanwhile, in a large skillet over medium heat, cook and stir onions in oil for 15-20 minutes or until golden brown. Add spinach and rosemary; cook 1-2 minutes longer or until spinach is wilted.

2.    In a large saucepan, melt butter. Stir in flour and pepper until smooth. Gradually add milk. Bring to a boil; cook and stir for 2 minutes or until thickened. Remove from the heat. Stir in ricotta and goat cheeses until blended.

3.    Drain pasta; place in a large bowl. Add the ham, onion mixture and sauce; toss to coat.

4.    Transfer to a greased 13-in. x 9-in. baking dish; sprinkle with Parmesan cheese. Bake, uncovered, at 350° for 25-30 minutes or until bubbly. Yield: 12 servings (1 cup each).


I soften my chopped onion with the butter called for before added the flour. I added fresh herbs to this.
I diced the ham and set it aside for later.
I made a roux by adding flour to the butter and onions and then whisked in the milk. I waited for my cream sauce to thicken;  stirring often. Since I quadrupled the recipe I added the cheese to the cream sauce in a large bowl off of the heat.
Look who wants to help!
Instead of ricotta and goats cheese I used light cream cheese and mozerella. I also used penne noodles instead of shells.
Once my pasta was cooked al dente I made sure the seasoning was right on my cream sauce before I assembled the bakes.
This needed Salt and lots of pepper!
At this point I realized I had too much sauce compared to noodles so I heated up more water and cooked more noodles. In they went to the mix and then I evenly divided that into 6 cassorole dishes.
I made my own crispy topping for the pasta bakes; Rice Krispies, shredded mozzarella, melted butter and salt. I mixed this up and evenly distributed over each pasta bake.

All done six pasta bakes; one for dinner and five for the freezer. I covered these with Saran Wrap and then tin foil. These should keep for 4-6 weeks in the freezer. They usually don't last that long!
Waiting patiently for Aubrey to be done school!
Now for dessert; oatmeal chocolate chip cookies with pure vanilla courtesy of my friend. I love yummy gifts!

The pasta bake was very creamy but needed a little more pizzaz for my taste but nothing a shot of hot sauce can't fix. Aubrey had seconds which is a very good thing when I have 5 more casseroles in the freezer!

Thursday, 17 September 2015

Toquitos and meat pies; One filling, two recipes

So my new normal while Aubrey is at school is hanging out with my little man solo. As I readjust I am choosing to see the things to be thankful for; at the top of my list would be my family that's for sure.
With the fall season seems to come a very busy time of year; a perfect time to fill the freezer and make meal planning a snap.
To start I whipped up this filling using leftover pork; I chopped up the pork and added 2 cans of beans, frozen corn, diced pepper, shredded cheese and taco seasoning and salsa.
I scooped this filling into tortilla wraps, rolled them up and laid them on a parchment lined cookie sheet seam side down. I put this tray into the freezer since these are easier to package when frozen. 
With still 1/2 of the filling left I ran out  of wraps so I decided to make meat pies with the remaining filling.
I topped these with homemade pie dough from my freezer.
You can basically top anything with pie dough and call it a day
I packaged all these meals up, labelled them with cooking instructions and put them in the freezer. These meals are ready  to share with friends. The perfect remedy to stop feeling sorry for yourself is to think of how you can help someone else!
Feeling like my freezer was lacking without frozen cookies I decided to whip up my quadruple batch of cookies. This recipe makes more than enough to share.
We decided to make up little thank you packages for Aubrey's teachers; week one. Done. Oh boy I couldn't imagine having that job; it takes a very special person to teach kindergarten!
Speaking of needing patience....Liam really wanted a cookie!

This was the perfect way to end my day; "chopped" mommy time with this dolly! Looking for the positive in life is way more fun; I have a whole lot to be grateful for!

Friday, 11 September 2015

Homemade vanilla Icecream by chef Aubrey

We went to a friends house last week and our host had made homemade icecream when we arrived. Aubrey thought it was very "master chef"  of her and she was totally impressed. Aubrey  asked to borrow the icecream machine and then I gently told her that we own one. Well you could say I rocked her world! So since that visit she has asked to make ice cream pretty much everyday. Our friend provided me with a recipe guideline and the tweaks she has made.  She used;
1can sweetened condensed milk
2&1/2 cups whole milk
1cup whipping cream
Vanilla and cinnamon
Pinch of salt; which we forgot!
Since there are no eggs in this recipe it doesn't need to be heated. Also what makes this recipe great is that with the sweetened condensed milk you don't need any extra sugar. 

The hardest part of making icecream is remembering to put the icecream maker bowl in the freezer; from now on I think I should just leave it in the freezer.

After Aubrey's first day of school I told her we would make icecream; so a promise is a promise!
We got to work and Aubrey measured everything; with my help.

2&1/2 cups of Milk
1 cup of cream
I can of sweetened condensed milk
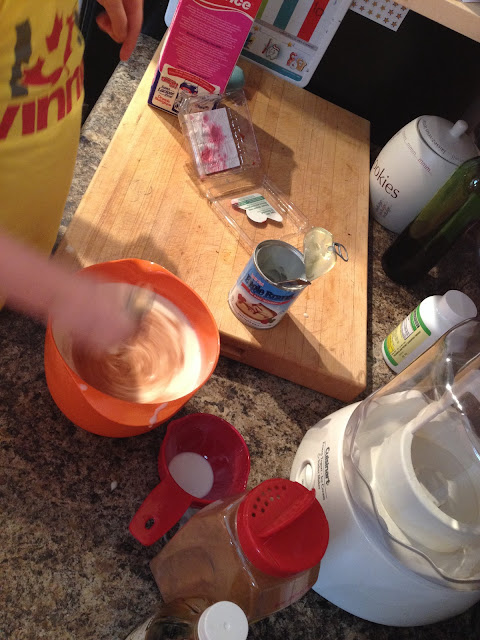
And Aubrey whisked that together
I periodically checked on Liam in the next room; he loves to gaze out the window.
Our chef gave it a taste and we decided to add a pinch of cinnamon and a splash of vanilla. 
Whisking....
I pulled the icecream maker bowl from the freezer; I had it in there for over 24 hours. It needs to be thoroughly frozen to
churn icecream.
With the icecream machine turned on Aubrey poured the Icecream base into it.
Now to wait...
And wait....
And wait....
We were planning to stand there and watch it churn but then I was reminded that it takes about 20 minutes so we decided to go into the other room and play.
At about 15 minutes I heard the sound coming from the machine change so I could tell we were almost there.
About ten more minutes and voila!

We scooped it into a pail to store it in the freezer.
Aubrey was a little excited!
Aubrey and Liam had some but I think I'll wait until the house is quiet to enjoy my bowl of homemade vanilla icecream.
What a fun way to end the day! I think we'll add pumpkin spice and a bit of pumpkin puree to the next batch for a festive seasonal variety!

Thursday, 10 September 2015

Pumpkin spice cupcakes

My friend had given me a litre of frozen pumpkin purée from her garden a while ago and this morning I woke up and thought "today is the day"!  I found this recipe on Pinterest and it looked pretty straight forward.

The colour of the pumpkin was amazing.


I wanted to make them for my work so I quadrupled the recipe and then filled the lined cupcake tin 3/4 full.
I love my icecream scoop; it makes portioning cupcakes a breeze.
Now for the icing.... I did not follow the recipe. I found the cake quite sweet so I wanted the icing to be less sweet.
I used three tubs of cream cheese which is essentially six bricks ofcream cheese. I whipped that with one cup of salted butter. I then added ground cinnamon and vanilla and whipped it more.

I then added 3 cups of icing sugar; waaaaaay less then called for.
The icing was pretty loose so I put it in the fridge for two hours before I iced the cupcakes.
This little monkey was growling at the cupcakes so I let him be the taste tester.
He approved.

I piped the icing onto  the cupcake to portion it and then spread it with an offset spatula. I had just the right amount of icing for 5 dozen cupcakes.
All done!
I'm excited to eat one; But I think I'll wait until the party!